 DIY Tarmac Repairs
Tarmac is a popular material for driveways and paths due to its durability and aesthetic appeal. However, over time it can become damaged, with cracks and potholes forming that not only look unsightly but can also be a hazard. Fortunately, there are some simple DIY tarmac repair solutions that anyone can do.
It’s important to note that these DIY repairs may not provide a permanent fix, especially if the underlying cause of the damage isn’t addressed. For example, if your driveway has poor drainage or heavy vehicles are frequently parked on it causing excessive wear then you may need to address these issues first before attempting any repairs. Nonetheless, for small-scale damage caused by weathering or normal usage, DIY tarmac repairs can save you time and money compared to having to hire a professional contractor. Repairing small areas of cracked or damaged tarmac is easier than it looks!
Preparing the Area
 Before starting any tarmac repair project, it is important to prepare the area properly. The first step is to clear any debris from the surface of the tarmac. Remove any loose stones or weeds growing in cracks and crevices. Use a stiff brush to sweep away dirt and dust.
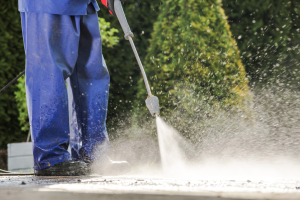
Next, thoroughly clean the surface by using a pressure washer or hosepipe with a strong jet of water. This will ensure that all loose material is removed and provide a clean surface for repairing. Allow the area to dry completely before proceeding with repairs.
If there are any oil stains on the tarmac, you can use oil absorbers or degreasers to remove them before commencing repairs as this may affect how well your repair holds up over time.
Finally, if there are any large potholes or cracks in your driveway, consider filling them with gravel or sand prior to starting your repair work so as not to waste additional materials when they sink into such depressions during application of new tarmac layer.
Patching Cracks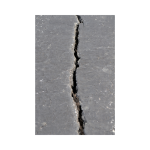
Patching cracks in your tarmac driveway or pathway is an essential DIY task that can prevent further damage and deterioration. While it may seem like a daunting task, with the right tools and techniques, patching cracks is a straightforward process that anyone can do.
The first step to patching cracks is cleaning the area thoroughly as described above. This will provide better adhesion for the repair material and help achieve a more robust repair. After cleaning, you should apply a primer to ensure good bonding between the existing surface and the new material.
Next, use crack filler or cold lay tarmac mix to fill up any visible gaps in the surface of your tarmac driveway or path. The filler should be applied generously into each crack until level with the surrounding area but not overfilled. Once done applying filler using either brush or spatula, leave it alone for several hours before removing excess material on top by lightly brushing off loose stone chippings with stiff bristles broom followed by leaf blower then ensuring no residue left behind before sealing with sealant coat for longevity of repairs done.
Filling Gouges
Gouges are deep cracks or holes that can cause significant damage to your tarmac surface. Filling these gouges is necessary to prevent further deterioration and prolong the lifespan of your driveway. To fill a gouge, you will need a high-quality tarmac filler, a putty knife, and some sand.
The first step in filling a gouge is to clean the area thoroughly. Use a stiff brush or power washer to remove any dirt, debris, or loose material from the crack before applying the filler. Once you have cleaned the area, apply the filler using your putty knife until it reaches slightly above ground level. Allow it to dry completely before smoothing out any rough edges with sandpaper.
It’s important to note that if you have large or numerous gouges on your tarmac surface, it may be best to hire a professional contractor for repairs instead of attempting DIY fixes. There may be underlying issues which a professional can identify and in so doing provide you with long-lasting solutions that won’t require constant maintenance down the road.
Patching Potholes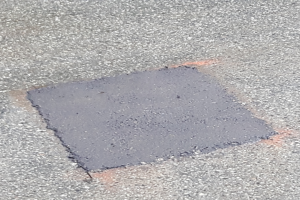
With a few basic tools and materials, anyone can patch potholes themselves. One of the simplest and most effective ways to do this is by using cold lay tarmac to fill in the damaged areas.
Before starting, as we’ve said before, it’s important to clean out any loose debris from the pothole and ensure that the surface is dry.
You should make the edges of the pothole square using a hammer and chisel. This will ensure a better bond between the cold mix used to patch it and the existing surface. When done make sure to clear the debris out and compact the bottom of the hole with a hand rammer or some other suitable implement.
Next, pour cold lay tarmac into the hole until it reaches just above ground level. Use a shovel or tool to compress the tarmac down firmly and level it off with the surrounding area. It is important that you don’t leave the newly formed patch lower than the existing surface as this will allow water to stand which over time will create cracking and/or potholes.
Wait for at least 24 hours before driving on or walking over the repaired area.
Sealing the Surface
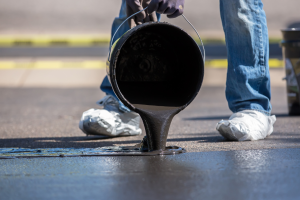 Sealing the surface of a tarmac driveway is a simple and effective way to extend its life, prevent damage, and keep it looking great. It also helps to seal off any tiny cracks that are beginning to form and prevent them from getting any worse. If your driveway needs other repairs such as crack sealing and pothole patching don’t seal the surface before you have carried out these other repairs because sealing will make your driveway look uniform and hide the blemishes caused by your other repair works.
There are many types of sealants on the market that can be used to seal tarmac surfaces. However, it is important to choose the right one for your specific needs. Some sealants are designed specifically for use on driveways, while others are better suited for larger commercial applications.
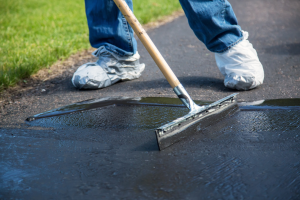
Before applying any sealant, once again as described above, it is important to clean the surface thoroughly. This will ensure that there is no dirt or debris left behind that could interfere with the application process. Once the surface is clean, apply a thin layer of sealant using a brush or roller. Be sure to follow the manufacturer’s instructions carefully and allow sufficient time for drying before using your driveway again.
Remember that sealing your tarmac surface should be done as part of regular maintenance and care routine. Doing so can help prevent damage from UV rays, oil spills, and other factors that can cause wear and tear over time.
Easy and Effective Tarmac Repair
In conclusion, repairing tarmac is a simple task that can be easily accomplished with the right tools and techniques. DIY repairs can save you money and prevent further damage to your driveway. It’s important to first identify the type of damage that needs fixing, whether it’s cracks, potholes, or surface damage.
For small cracks or holes, using a tarmac repair kit can provide an easy fix. For larger areas of damage such as potholes, cutting out the damaged area and replacing it with fresh tarmac is necessary for a long-lasting repair. To ensure proper adhesion of the new tarmac, it’s important to properly clean and prepare the damaged area before applying any patching material.
In summary, by following these simple steps you can quickly and effectively repair any damage to your tarmac surfaces without breaking the bank.